By Max Green
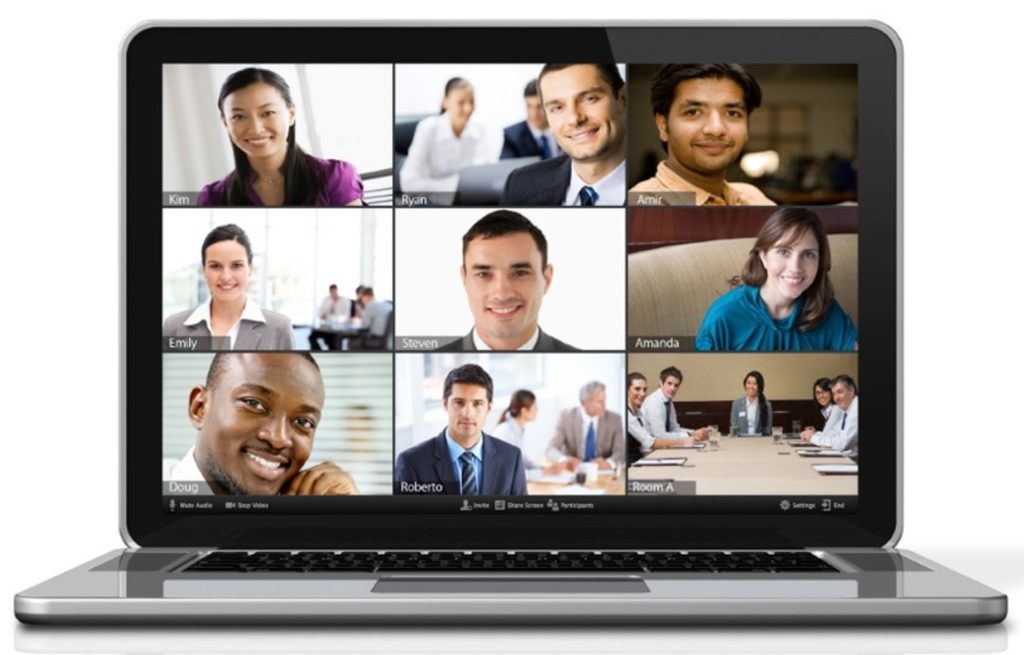
Online collaboration tools have been widely used for quite a long time now. Professionals regularly use video conferencing services to talk with colleagues around the world. But it wasn’t until COVID-19 put our entire country on lockdown that we found ourselves talking to our office mates through various online collaboration tools. As a result, it’s more important now than ever to look professional online.
One of the best ways to do this is by changing up your lighting to make you look presentable and professional.
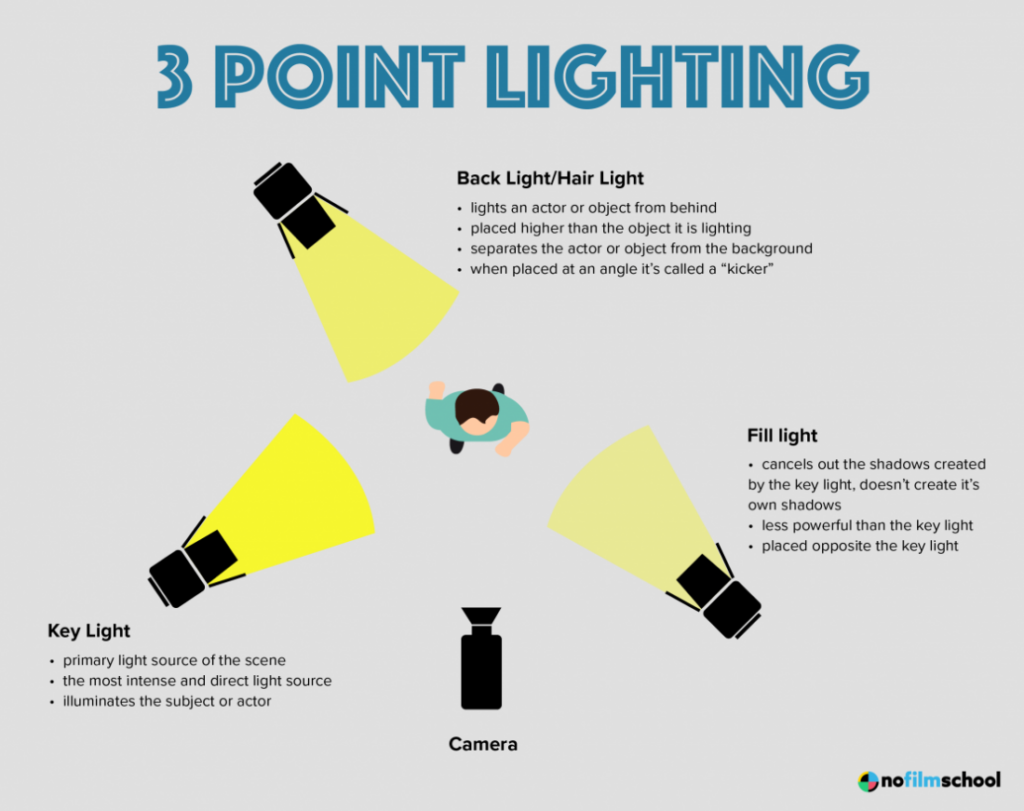
Lighting professionals use a three-point light setup to illuminate a shot, allowing them full control of light and shadow. The three points are Backlight, Key Light, and Fill Light. Instead of spending a lot of money on pro-lighting, here are ten easy tips and tricks that you can do with what you already have that will positively change how your colleagues perceive you online.
.
1: Take inventory of every light source in your office.
This means looking for windows, lamps, overhead lighting, and even your computer screens. The amount of light and the direction it is coming from can make or break your video quality.
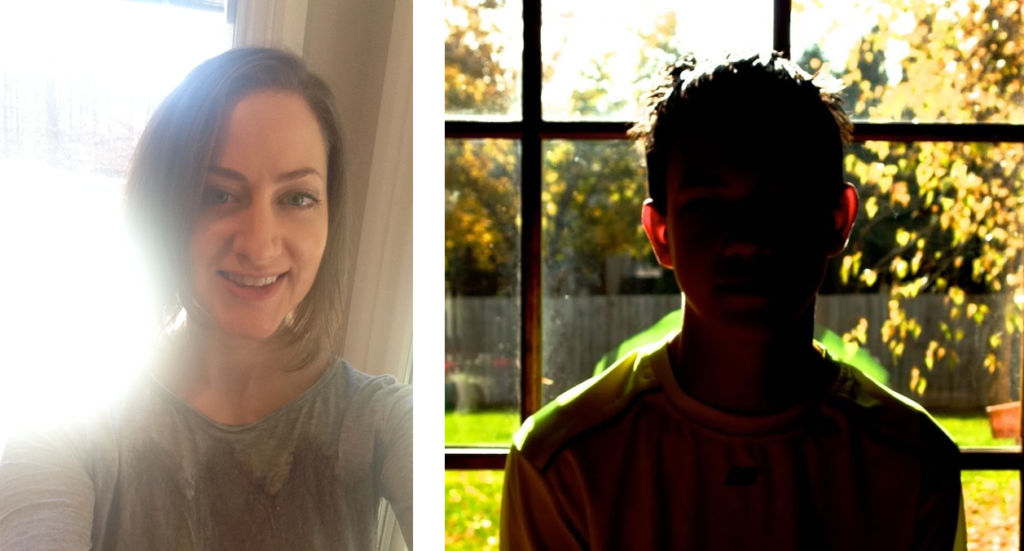
It’s also important to pay attention to how much natural light comes into your office at different times of the day. If it’s late afternoon and your side window is wide open, the sunlight could be washing your face with bright light, making you look like a ghost on a webcam. Pros refer to this as “Blowout.” Conversely, if the light is behind you, your face could be dark and obscured, which is called “Silhouetting.”
Once you have a good idea of all of the light sources in your office, you can easily determine what sources are hindering your video conference calls and what sources are helping.
2: Pay attention to the quality and strength of your light sources.
Light sources are defined by two factors: The color of the light and the quality of the light.
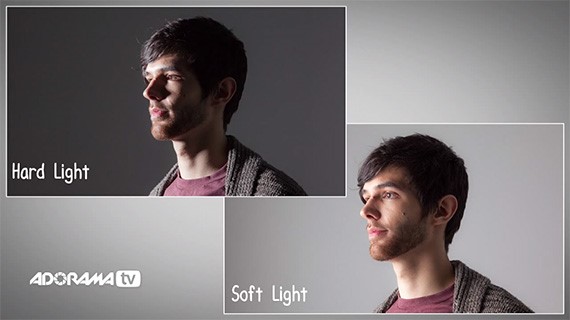
In online collaboration, color is usually not as important as the quality of the light source. Light quality is determined by only two definitions: Hard light and Soft light.
The best example of Hard light is direct sunlight. It is strong and puts an extreme amount of light. When shining directly on your face, it will “blow out” and make you look white on a camera. Direct light from an uncovered light bulb is another great example of Hard light.
Soft light is what you see on a cloudy day. The sunlight travels through the clouds and diffuses. Nothing is too bright or harshly reflects the light. You also see this when looking at the light shining through a lighter colored lampshade or overhead lighting with fogged glass covering the bulb.
Hard light is great for lighting backgrounds but is terrible for lighting your face. Soft light is good for the exact opposite. Move the light sources in your office based on their quality to tune your lighting.
3: Find out where your light is going.
The direction of each light is pointing extremely important. Different types of light sources will send light in very specific directions. You might think a certain lamp that you have lights your face perfectly, but in many cases, lampshades block light and push it onto the ceiling or floor.
Sure, it might light the room nicely for you in person, but it could throw off the entire image online. Hard light from a directional lamp or a window can do wonders for lighting the room – but can blowout your face, making it too light.
Another thing to note is your overhead lighting. If you have a light directly above you pushing light onto the top of your head, you risk lighting only specific parts of your face. Once you understand your light sources and where the light is going, you can tune it to aid you and make changes to greatly improve lighting quality.
4: Pay attention to how much light your computer screen puts out.
Even with a nice three-point setup, a bright white computer screen can completely ruin your lighting. If this is the case, consider turning down the brightness on your screen or find a wallpaper for your desktop that is darker. Often, we share documents while on a call. Make sure your colleagues can see the doc and at the same time not overpower your face lighting. Microsoft 365 has grey and black themes that are easy on the eyes and can reduce blowout and silhouetting.
5: Pay attention to the light that’s behind you.
One of the most important factors is your Backlight. Too much backlight is almost always the cause of silhouetting resulting in you being completely dark and not visible to your colleagues. This could be an open window directly behind you or a lamp pushing way too much light in your direction. This can make or break your video quality.
On the other hand, good backlighting will provide depth to your office and separate you from the background. This will result in some great images. Place a lamp or move your camera in a way that will allow light to fill the space behind you but not strike directly into the camera. Make sure that your backlight(s) are not in your camera frame. Cover any windows that are behind you and ensure only light from your intended sources is entering the area behind you.
6: Create a Key Light to light your face.
A Key Light is a bright soft source that shines on your face. It provides definition and prevents light overlap and shadows from other lights in your office from ruining your image. Look for lamps with lighter colored lamps shades or a window with cloth blinds. Depending on their strength place them or place your camera at a point where the light source is out of frame but casts light on your face from a 45-degree angle in front of you. If you can, keep the light source higher than your face. Ideally, the light will cast down onto one side and the front of your face. This will define your facial features and create a pleasant image of yourself for your colleagues.
7: Create a Fill Light to define the rest of your face.
A Fill Light is a much weaker Key Light that is placed opposite the Key Light. The point of the Fill Light is self-explanatory – it fills the rest of your face with light.
You don’t always have to use a Fill Light. If you have balanced overhead lighting, especially if it is above and in front of you, it will likely fill the rest of your face. If you don’t have any overhead lighting, place a light that is significantly less powerful than your Fill Light at a 45-degree angle in front of you that is on the opposite side of your face from the Key Light. It will cut out the remaining shadows caused by the key.
8: Turn off any unneeded light sources.
Once you have your three points covered, find any unnecessary lights. Close and cover windows, turn off extra lamps, and close your doors. In addition to managing your lights, you are minimizing excess noise and saving energy! Any lights that can blowout the walls behind you or fill the room with too much light should be turned off.
9: Consider your camera position.
If you don’t have moveable light sources, try moving your camera to different locations on your desk. This will effectively change the impact of your lights as far as the camera is concerned. If you have light pushing light directly at the camera, moving it can easily fix the issue. Quite often, lighting problems can be solved by simply moving your camera or your desk.
10: If you have the money, invest in some cheap video lights.
Proper video lights can provide an easy, portable, and powerful solution to any lighting issue. They often can be placed anywhere you’d like and with the right equipment, you can tune the color, strength, and quality on the fly. You can find video lights at almost any price point and lighting your office will never be easier.
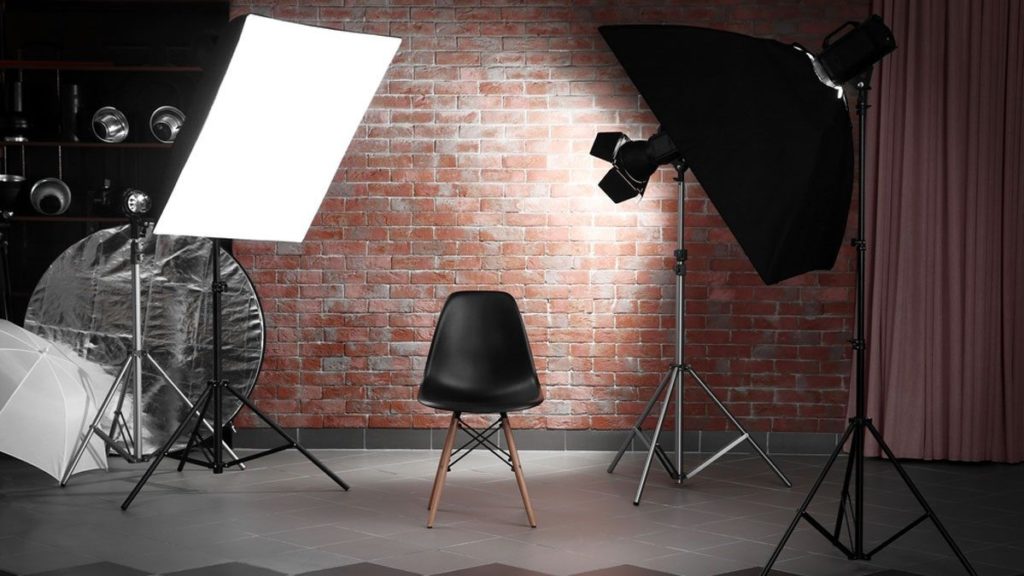
The Backlight, Key Light, and Fill Lights culminate into the Three-Point Lighting technique. Three-point lighting is the bread and butter of all filmmakers and is used to create a pleasing image in interviews, feature films, and everything in between. If done right, it will almost always create a professional image for the viewer.
Proper lighting in a video conference setting can separate you from the rest. It will provide a professional and thoughtful look to your image and can mean the difference between getting your point across and being distracting. If you follow the 10 tips listed above, your lighting will look great and your colleagues will be impressed. For more information on proper lighting for your online collaboration environment, click here.

Max Green is a lighting consultant for Memory Spring. He is a passionate filmmaker from Denver, Colorado who specializes in camera and lighting technology. He has worked on independent feature films, solo projects, and corporate educational videos. With both an Associates and Bachelors degree in film production, Max brings an informed and dedicated attitude to every project.
Recommended Online Collaboration Articles
Successful Transitions and Handoffs
Nice article Max!